原文链接:https://letsbuildui.dev/articles/building-an-audio-player-with-react-hooks
今天我们将使用 HTMLAudioElement 接口构建一个基于 React Hooks 的音频播放器组件。这个播放器可以实现音频列表的播放、暂停、进度条拖动以及跳转到下一首或上一首曲目。另外,我们还会给播放器加一个变幻的背景色,让它看起来炫酷一些。
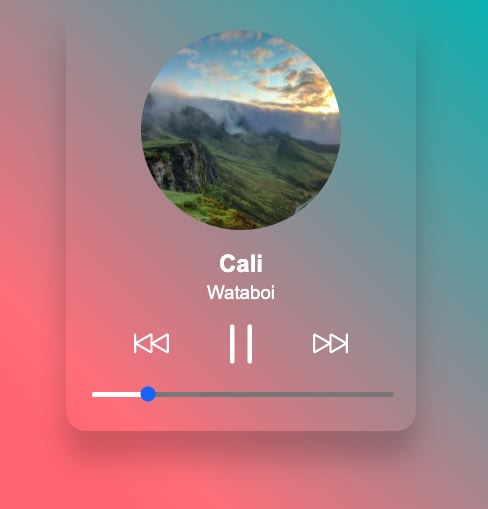
这个音频播放器的设计灵感来自Dribbble show,示例音乐来自Pixable。
开始吧!
HTMLAudioElement 概览
我们处理网页上的音频有多种不同的方式。最常见的就是使用 <audio> 标签,或者用 Web Audio API 来实现更底层的音频控制。本教程将采用的方法是 HTMLAudioElement 接口。
HTMLAudioElement 接口提供
</audio><audio>元素的属性访问及一系列操控它的方法。—— MDN文档
使用它非常简单:
const audioElement = new Audio(audio source);
上面代码中 Audio() 构造函数返回一个 audio 元素,包含了针对这个音频源的方法和数据。
audioElement.play();
audioElement.pause();

audioElement.currentTime;
audioElement.ended;
audioElement.duration;
我们很快就会用到上述这些方法。不过首先,我们要先定义一下我们所开发的音频播放器组件的属性选项。
定义组件的属性
组件所需的属性仅仅是一个音频的播放列表就够了。我们提供一个数组,数组中每个元素包含了单个音频的标题、歌手、音频地址、封面和颜色。
const tracks = [
    {
        title: string,
        artist: string,
        audioSrc: string | import,
        image: string,
        color: string,
    },
    //...
    //...
];
音频播放器组件
新建一个文件 AudioPlayer.jsx,引入 useState、useEffect,useRef。
我们需要定义3个 state,分别是:
trackIndex当前播放曲目的索引。trackProgress当前音轨的播放进度。isPlaying是否正在播放(或暂停)。
import React, { useState, useEffect, useRef } from 'react';

const AudioPlayer = ({ tracks }) => {
    // State
    const [trackIndex, setTrackIndex] = useState(0);
    const [trackProgress, setTrackProgress] = useState(0);
    const [isPlaying, setIsPlaying] = useState(false);

    return <></>;
}

export default AudioPlayer;
除了 state,我们还需要3个 refs:
audioRef使用Audio构造函数创建的audio元素。intervalRef一个对时间定时器setInterval的引用。isReady一个布尔值,确定一些操作是否在可运行状态。
const AudioPlayer = () => {
    // State
    //...

    // Destructure for conciseness
    const { title, artist, color, image, audioSrc } = tracks[trackIndex];

    // Refs
    const audioRef = useRef(new Audio(audioSrc));
    const intervalRef = useRef();
    const isReady = useRef(false);

    // Destructure for conciseness
    const { duration } = audioRef.current;

    return <></>;
}
下一步我们增加两个function:toPrevTrack用来处理“上一首”的按钮点击事件,toNextTrack处理“下一首”。随后我们再完善这两个函数。
const AudioPlayer = () => {
    // State
    //...

    // Refs
    //...

    const toPrevTrack = () => {
        console.log('TODO go to prev');
    }

    const toNextTrack = () => {
        console.log('TODO go to next');
    }

    return <></>;
}
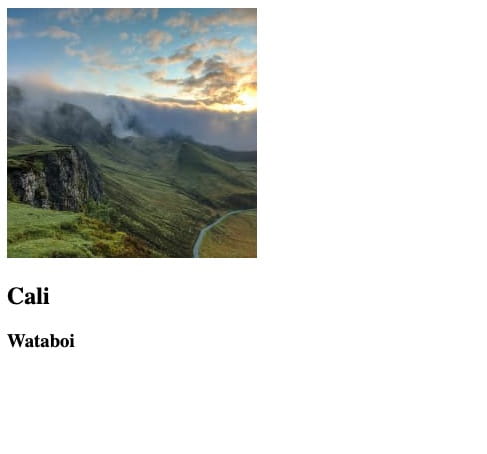
之后,我们来写播放器的HTML,需要展示音频的封面、标题、歌手,默认播放列表中的第一首曲目。
const AudioPlayer = () => {
    // ...

    return (
        <div className="audio-player">
            <div className="track-info">
                <img className="artwork"
                    src={image}
                    alt={`track artwork for ${title} by ${artist}`}
                />
                <h2 className="title">{title}</h2>
                <h3 className="artist">{artist}</h3>
            </div>
        </div>
    );
}
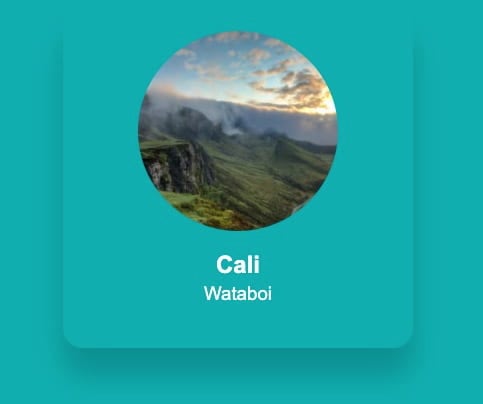
看起来不错,但是还不够精致,我们接下来添加样式。
播放器的样式
我们会使用一些简单的CSS变量。
其中
--active-color变量,会用在背景色变换上。
:root {
    --white: #fff;
    --active-color: #00aeb0;
}

* {
    box-sizing: border-box;
}

html {
    font-family: Arial, Helvetica, sans-serif;
    height: 100%;
    background: var(--active-color);
    transition: background 0.4s ease;
}

button {
    background: none;
    border: none;
    cursor: pointer;
}
针对播放器的样式:
.audio-player {
    max-width: 350px;
    border-radius: 20px;
    padding: 24px;
    box-shadow: 0 28px 28px rgba(0, 0, 0, 0.2);
    margin: auto;
    color: var(--white);
}

.artwork {
    border-radius: 120px;
    display: block;
    margin: auto;
    height: 200px;
    width: 200px;
}

.track-info {
    text-align: center;
    z-index: 1;
    position: relative;
}

.title {
    font-weight: 700;
    margin-bottom: 4px;
}

.artist {
    font-weight: 300;
    margin-top: 0;
}
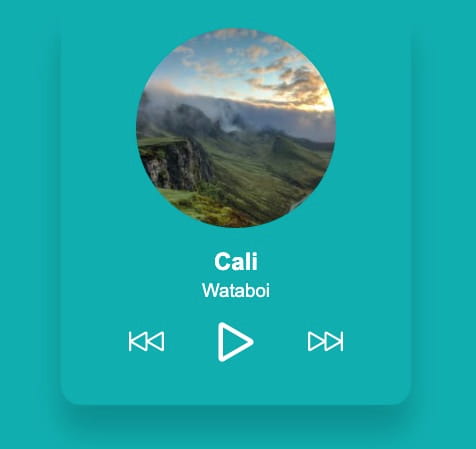
现在我们来写播放器的控制部分。
控制组件
音频控制组件提供播放、暂停、上一首、下一首按钮。我们将这些控制元素提取出来组成单独组件,与播放器主体 AudioPlayer 组件分离。
首先新建文件 AudioControls.jsx。组件需要一些属性,我们需要知道音频是否正在播放,这样我们才能决定应该显示播放按钮还是暂停按钮。我们传入 state 值 isPlaying 作为属性。我们还需要传入一些handle函数来处理播放或暂停、上一首、下一首这些动作,分别是 onPlayPauseClick、onPrevClick、onNextClick。
const AudioControls = ({
    isPlaying,
    onPlayPauseClick,
    onPrevClick,
    onNextClick,
}) => {
    // ...
}

export default AudioControls;
然后是控制组件的HTML:
svg 的使用取决于你的环境配置。Create React App 默认可以使用svg,如果你用了其他构建工具可能需要配置wbpack以让它可用。
import React from 'react';
import { ReactComponent as Play } from './assets/play.svg';
import { ReactComponent as Pause } from './assets/pause.svg';
import { ReactComponent as Next } from './assets/next.svg';
import { ReactComponent as Prev } from './assets/prev.svg';

const AudioControls = ({
    // ...
}) => (
    <div className="audio-controls">
        <button
            type="button"
            className="prev"
            aria-label="Previous"
            onClick={onPrevClick}
        >
            <Prev />
        </button>
        {
            isPlaying ? (
                <button
                    type="button"
                    className="pause"
                    onClick={() => onPlayPauseClick(false)}
                    aria-label="Pause"
                >
                    <Pause />
                </button>
            ) : (
                <button
                    type="button"
                    className="play"
                    onClick={() => onPlayPauseClick(true)}
                    aria-label="Play"
                >
                    <Play />
                </button>
            )
        }
        <button
            type="button"
            className="next"
            aria-label="Next"
            onClick={onNextClick}
        >
            <Next />
        </button>
    </div>
);
最后,为控制器定义样式。
.audio-controls {
    display: flex;
    justify-content: space-between;
    width:  75%;
    margin: 0 auto 15px;
}

.audio-controls .prev svg,
.audio-controls .next svg {
    width: 35px;
    height: 35px;
}

.audio-controls .play svg,
.audio-controls .pause svg {
    height: 40px;
    width: 40px;
}

.audio-controls path {
    fill: var(--white);
}
把控制组件 AudioControls 添加到播放器主体 AudioPlayer 组件中,并为其添加相关属性( isPlaying 以及 handlers)。
import AudioControls from './AudioControls';

const AudioPlayer = () => {
    // ...
    // ...
    return (
        <div className="audio-player">
            <div className="track-info">
                <img className="artwork"
                    src={image}
                    alt={`track artwork for ${title} by ${artist}`}
                />
                <h2>{title}</h2>
                <h3>{artist}</h3>
                <audiocontrols
                    isPlaying={isPlaying}
                    onPrevClick={toPrevTrack}
                    onNextClick={toNextTrack}
                    onPlayPauseClick={setIsPlaying}></audiocontrols>
            </div>
        </div>
    );
}
这些播放控制按钮就位了,接下来我们让播放器运行起来。
音频播放器的操作
回到 AudioPlayer 组件,我们完成之前定义的 toPrevTrack 和 toNextTrack 函数。
点击“下一首”需要播放列表中的下一曲目,或者回到开始。点击“上一首”则相反。
我们这里使用到state值 trackIndex 和 tracks 的长度。
const toPrevTrack = () => {
    if (trackIndex - 1 < 0) {
        setTrackIndex(tracks.length - 1);
    } else {
        setTrackIndex(trackIndex - 1);
    }
}

const toNextTrack = () => {
    if (trackIndex < tracks.length - 1) {
        setTrackIndex(trackIndex + 1);
    } else {
        setTrackIndex(0);
    }
}
现在就可以在列表中切换曲目了。
我们添加一些 useEffect 钩子。
第一个是点击“播放或暂停”按钮的时候,来开始或停止播放。
useEffect(() => {
    if (isPlaying) {
        audioRef.current.play();
    } else {
        audioRef.current.pause();
    }
}, [isPlaying]);
当 isPlaying 值改变,我们根据它的值来调用 audioRef 的 play() 或 pause() 方法。
现在你点播放按钮就可以听到声音了,并且点击暂停可以停止。
接下来这个 useEffect 钩子将在组件卸载时做些清理工作。当组件卸载,我们想要确定音频停止,并且把可能在运行的定时器清空。随后我们会介绍更多有关定时器的内容!
useEffect(() => {
    // Pause and clean up on unmount
    return () => {
        audioRef.current.pause();
        clearInterval(intervalRef.current);
    }
}, []);
最后一个 useEffect 钩子会在 state trackIndex 改变时运行。它允许我们暂停当前曲目,更新 audioRef 的值为一个新的音频源,重置播放进度条,并开始新曲目的播放。
// Handle setup when changing tracks
useEffect(() => {
    audioRef.current.pause();

    audioRef.current = new Audio(audioSrc);
    setTrackProgress(audioRef.current.currentTime);

    if (isReady.current) {
        audioRef.current.play();
        setIsPlaying(true);
        startTimer();
    } else {
        // Set the isReady ref as true for the next pass
        isReady.current = true;
    }
}, [trackIndex]);
这里我们设置首次运行(组件初始化)时 isReady 的值。这样可以防止这个 useEffect 在首次运行时音频开始自动播放,这不是我们希望的。第二次以及随后运行(当 trackIndex 改变)时,才是我们期望开始播放的逻辑。
如果你测试播放器的控件,会发现它们已经正常工作了。
播放进度和滑块
接下来我们要显示音轨的播放进度,添加滑块功能,可以滑到曲目某个时间位置。
在 AudioPlayer 组件中,定义一个新的函数 startTimer。当一个音频开始播放的时候,这个函数就会启动一个新的 setInterval 计时器。
const AudioPlayer = () => {
    // ...
    // ...

    const startTimer = () => {
        // Clear any timers already running
        clearInterval(intervalRef.current);

        intervalRef.current = setInterval(() => {
            if (audioRef.current.ended) {
                toNextTrack();
            } else {
                setTrackProgress(audioRef.current.currentTime);
            }
        }, [1000]);
    }
}
每隔一秒,我们检查音频是否已经播放完。如果播放完,跳到下一个音频,然后更新 trackProgress state。计时器的 ID 存储在 intervalRef,因此我们可以在组件的其他地方清除计时器。
The function is called as part of thehooks we added in the previous section. First, add it when thestate changes and is true.
函数 startTimer 会作为我们前面添加的 useEffect hooks 的一部分被调用。首先,当 isPlaying state 变化并且值为 true 时执行。
useEffect(() => {
    if (isPlaying) {
        audioRef.current.play();
        startTimer();
    } else {
        clearInterval(intervalRef.current);
        audioRef.current.pause();
    }
}, [isPlaying]);
trackIndex 的值改变时,也需要执行 startTimer 函数。
useEffect(() => {
    audioRef.current.pause();

    audioRef.current = new Audio(audioSrc);
    setTrackProgress(audioRef.current.currentTime);

    if (isReady.current) {
        audioRef.current.play();
        setIsPlaying(true);
        startTimer();
    }
}, [trackIndex]);
现在我们可以着手进度条了。
为了让界面方便可控,我们使用原生HTML的 range input 来实现进度条。这样可以让我们使用鼠标或键盘自由地拖动进度,并且有大量的事件便于处理。
return (
    <div className="audio-player">
        <div className="track-info">
            // ...
            <audiocontrols ...></audiocontrols>
            <input type="range"
                value={trackProgress}
                step="1"
                min="0"
                max={duration ? duration : `${duration}`}
                className="progress"
                onChange={(e) =/> onScrub(e.target.value)}
                onMouseUp={onScrubEnd}
                onKeyUp={onScrubEnd}
            />
        </div>
    </div>
);
duration的值会被初始化为NaN。React 抛出警告:“Received NaN for themaxattribute. If this is expected, cast the value to a string”。按照警告的建议,在音频开始播放,有真正的 duration 值替换之前,我们为其赋值为一个 string。
我们再添加2个函数:onScrubEnd 和 onScrub。在以下交互事件执行这2个函数:onkeyup、onChange 和 onMouseUp。
const onScrub = (value) => {
    // Clear any timers already running
    clearInterval(intervalRef.current);
    audioRef.current.currentTime = value;
    setTrackProgress(audioRef.current.currentTime);
}

const onScrubEnd = () => {
    // If not already playing, start
    if (!isPlaying) {
        setIsPlaying(true);
    }
    startTimer();
}
现在为进度条添加一些样式。
或许还有其它方法,但是 range input 左侧选过部分的样式似乎还没有一个跨浏览器的标准。下面采取的方案是使用
webkit-gradient,兼容 Chrome、Firefox 和 Sarari,但其它浏览器还没有测试。
使用一个常量保存当前播放进度的百分比。我们下面在 webkit-gradient 中直接使用这个百分比值,来显示 range input 的背景样式。
const currentPercentage = duration ? `${(trackProgress / duration) * 100}%` : '0%';
const trackStyling = `
    -webkit-gradient(linear, 0% 0%, 100% 0%, color-stop(${currentPercentage}, #fff), color-stop(${currentPercentage}, #777))
`;

return ( ... );
这样就创建了一个白色背景覆盖在 range input 上,来呈现音频播放的进度。

然后,将常量 trackStyling 作为 style 属性应用的 input 上。
return (
  ...
  ...
    <input type="range"
        value={trackProgress}
        step="1"
        min="0"
        max={duration ? duration : `${duration}`}
        className="progress"
        onChange={(e) =/> onScrub(e.target.value)}
        onMouseUp={onScrubEnd}
        onKeyUp={onScrubEnd}
        style={{ background: trackStyling }}
    />
);
最后为进度条添加 CSS 样式。
input[type=range] {
    height: 5px;
    -webkit-appearance: none;
    width: 100%;
    margin-bottom: 10px;
    border-radius: 8px;
    background: #3b7677;
    transition: background 0.2s ease;
    cursor: pointer;
}
友情提示,我发现如果你在 CSS 中尝试隐藏拖动块,然后用左右键头控制进度后退或前进,在 Safari 中会不流畅。因此,我索性将 range input 保留为浏览器默认样式。
改变背景色
我们要做的最后一件事是改变页面的背景色。因为每一个音频都会有一个相应的 color 值,我们要做的只是更新 CSS 中的变量 --active-color。之前我们设置了 HTML 使用这个变量作为背景,随着更新,我们会在曲目循环播放时看到颜色的变化。
我们从一个新的组件 Backdrop.jsx 开始。通过一个 useEffect hook,当 trackIndex 改变时,setProperty 方法会更新 CSS 变量值。
import React, { useEffect } from 'react';

const Backdrop = ({
    activeColor,
    trackIndex,
    isPlaying,
}) => {
    useEffect(() => {
        document.documentElement.style.setProperty('--active-color', activeColor);
    }, [trackIndex]);

    return (
        <div className={`color-backdrop ${isPlaying ? 'playing' : 'idle'}`}></div>
    );
};

export default Backdrop;
回到 AudioPlayer 组件, 在 track-info 之后引入 Backdrop 组件。
const AudioPlayer = () => {
    // ...
    // ...
    return (
        <div className="audio-player">
            <div className="track-info">
            // ...
            </div>
            <Backdrop
                trackIndex={trackIndex}
                activeColor={color}
                isPlaying={isPlaying}
            />
        </div>
    );
}

现在加点动画。同样也是使用 --active-color 变量设置一个渐变背景(linear-gradient),将其设置为整个屏幕的宽高。
.color-backdrop {
    background: linear-gradient(45deg, var(--active-color) 20%, transparent 100%) no-repeat;
    position: absolute;
    top: 0;
    left: 0;
    right: 0;
    bottom: 0;
    z-index: -1;
}

.color-backdrop.playing {
    animation: colorChange 20s alternate infinite;
}
The animation is applied when the audio is playing and the backdrop has the playing class. It’s done using the hue-rotate filter function.
当音频播放状态为 playing 时,backdrop 组件会包含class playing。然后通过 hue-rotate 这个 filter 函数来实现。
CSS 函数
hue-rotate()可以变换元素及内容的色调。—— MDN 文档
Hue-rotate 接受一个角度作为参数。我们在动画设置的 keyframe 当中把旋转角度设为360。
@keyframes colorChange {
  from {
    filter: hue-rotate(0deg);
  }
    to {
    filter: hue-rotate(360deg);
  }
}
友情提示,
hue-rotate不支持 IE 浏览器。如果你想在生产环境中使用这类动画,你需要把animation的相关样式写在
prefers-reduced-motion的媒体查询当中。请参见我关于这个问题写的 这篇文章。
总结
我们讲了这么多,感谢你看到了最后。现在你应该对音频相关处理有了很大把握,我希望能有助于你开发属于自己的更酷的音频项目。
因为我们也只是介绍了一个音频播放器的基本操作,还有更多可以添加的功能,比如音量控制、播放速度,也可以使用localStorage保存播放进度,你都可以去探索。你还可以在项目里使用Spotify的API或者其他音频源。
您的赞助将会支持作者创作及本站运维


发表评论